Happy Kids, Inc: Healthy Recipes
Showing posts with label Healthy Recipes. Show all posts
Monday, July 13, 2015

Easy Lime Ginger Chicken Skewers

Tracking Pixel
By Meg Hodson

This is a sponsored post for Foster Farms. i received compensation for my post, but all opinions
remain 100% my own. And you've got to try my awesome recipe below! 

Homemade dinners are very important to me. As crazy as schedules get, including my husband and I both working full time out of the house now, we still strive to have family dinners. Some nights, we have more time to cook and other nights time is tight. On top of all of that, I want meals to be as healthy as possible for my family. One menu staple I always turn to is fresh chicken. It's versatile, easy to fix, and my children love it! But I also want to select chickens that are raised without antibiotics, vegetarian fed and I also appreciate chicken that is grown on the West Coast, close to my home in Oregon. 

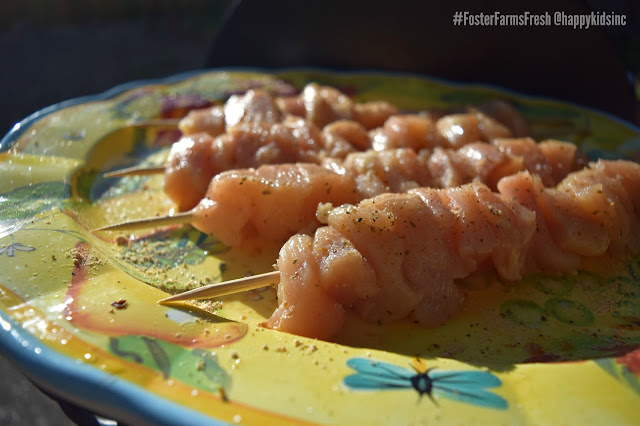
Lime Ginger Chicken Skewers recipe


Foster Farms Simply Raised chicken is just that. It's a major evolution for the brand, 
partly in response to the demand from millennial parents wanting healthier chicken  options for their family. Foster Farms has been a family-owned business since 1939.  With this new line of chicken, they are undergoing a true evolution of their brand. 

That evolution includes no added sodium to the chicken, American Humane Certified, and is minimally processed with no added preservatives. 

The recipe I created with Foster Farms Simply Raised chicken is so easy to make! It's a 
skewer-style recipe.....just dice and stack the chicken on skewers, drizzle with the easy-
to-prepare sauce, grill and it's done.

Lime Ginger Chicken Skewers
Serves 4-6

Ingredients:
Foster Farms Simply Raised thin sliced breast fillets
1/4 cup olive oil
1/4 cup maple syrup
1 teaspoon dry mustard
1 teaspoon sea salt
1 teaspoon basil
1 1/2 teaspoon ginger
1 lime

Lime Ginger Chicken Skewers recipe

Lime Ginger Chicken Skewers recipe


Cut chicken into 1 inch thick cubes. Gently line on wood skewers. Mix all dry spices together (except the dry mustard) and evenly sprinkle on both sides of the chicken. Mix olive oil, maple syrup, and dry mustard. Blend well. 

Transfer skewers to grill heated to medium. Place on grill and brush both sides with the olive oil mixture. Cooking times will vary, but they should be done in 7-10 minutes. Baste 2-3 more times while the chicken cooks. 

Lime Ginger Chicken Skewers recipe


Simple, easy, delicious. I hope you enjoy it!

This post is sponsored by Foster Farms®, the opinions expressed are my own.


Friday, April 17, 2015

Delicious Mocktail: Pineapple Fizz

By Meg Hodson

I received complimentary samples of Veri Soda from Moms Meet. My opinions are 100% my own and do not necessarily suggest the opinions of Veri Soda or Moms Meet.

Have you walked down a soda aisle lately? Sometimes I get dizzy from the sheer number of options, brands, and flavors. This is the case both for the traditional soda aisle and the "natural" soda aisle. If you are looking for alternative soda these days, you have a lot of options. In this day and age of consumers seeking out healthier options that are organic and non-GMO, brands have caught on and new brands have emerged. 

Delicious Organic Non-GMO Veri Soda

I am one of those consumers that prefers real ingredients in my food and even when choosing an option like soda, want to make the healthiest choice I can. Veri Soda uses only the best quality organic, non-GMO ingredients in their line of USDA NOP-certified organic soda. Veri Soda is sweetened with organic fruit juice, organic cane sugar, and organic stevia to deliver a refreshing soft drink with only 60 calories per can. The drinks are lightly carbonated, allowing you to really taste the flavor. Plus, there’s no harsh sweetness or lingering after-taste like most zero-calorie sodas. Veri Soda has a “low glycemic load,” meaning you won’t have a sugar spike (or the
dreaded crash after!). All Veri Sodas are caffeine free, even the cola flavor. 

Delicious Organic Non-GMO Veri Soda

Here's how the flavors break down:

Veri Ginger Ale harnesses the flavor of Asian ginger and finds the perfect balance of
spice, sweetness, and light carbonation.

Veri Orange is made with 12% real orange juice from oranges grown in Mexico and
Turkey.

Veri Cola delivers the subtle taste of cola with hints of cinnamon and real lemon juice.

Veri Lemon Lime is created with real juice from organic lemons and limes to deliver a
truly refreshing taste.

I decided to make a fun, very quick drink that is fancy without being fussy. It's perfect for kids and adults alike (but you could certainly make it an "adult beverage" by adding your favorite spirit!). I hope you enjoy it.


Pineapple Fizz Mocktail Made With Delicious Organic Non-GMO Veri Soda

Pineapple Fizz
Serves 2
Prep Time: 5 minutes

Ingredients:

Lemon Lime Veri Soda
Pineapple juice (no sugar added)
Fresh lime
Sugar

Rim the edge of a glass with a slice of lime and dip in sugar to coat the edge of your glasses. Add the soda to your glass 3/4 full. Top off with pineapple juice. Enjoy! 

Pineapple Fizz Mocktail made with Veri Soda


Follow along:
 photo facebooksoft_zps2ca46363.png photo instagramsoft_zps234eaf53.png photo twittersoft_zps7e0a4b92.png photo emailsoft_zps2931cb4a.png photo pininterestsoft_zps05cdae05.png photo googleplus_zps1619805c.png photo tumblrsoft_zpsd813c422.png photo rsssoft_zpsaf899a58.png
Friday, February 27, 2015

Not-So-Cheesy Mac 'n Cheese (Dairy Free)

By Meg Hodson

Yum! Who doesn't love a good macaroni and cheese? It's something I fix in our house regularly and I am always looking for ways to reinvent it. 

I came up with this delicious version of mac 'n cheese a few ways. First, I always keep lots of veggie purees on hand in my freezer to blend into recipes like marinara sauce, pasta, and more. So, I knew my butternut squash puree would be perfect for a vegan, dairy free macaroni and cheese. 

Second,  I have been experimenting with nutritional yeast lately. What the heck is nutritional yeast, you may ask? It's an organism that grows on molasses and then is harvested, washed, and dried with heat to kill or “deactivate” it. Because it’s inactive, it doesn’t froth or grow like baking yeast does so it has no leavening ability. It's high in B vitamins, selenium, zinc, and protein. It's low in fat and gluten free. It's easy to find in the bulk foods section (usually near flour) and sometimes you can find it in the spice aisle (Bragg, best known for their apple cider vinegar, makes a nutritional yeast seasoning). It's often used to make "cheesy" sauces, so I knew it would be perfect for my dairy free macaroni and cheese recipe.

I tested this on my kids and they really enjoyed it! I hope your family enjoys it, too!


Not-So-Cheesy Macaroni and Cheese


Prep time: 10 minutes
Cook time: 45 minutes
Total time: 55 minutes
Yield: Serves 4-6

Ingredients
  • 1 pound of your favorite pasta (I used large shells)
  • 3/4 cup pureed butternut squash
  • 1/4 cup pureed cauliflower
  • 1/2 cup + 2 tablespoons unsweetened coconut milk
  • 1 teaspoon granulated garlic
  • 1 teaspoon smoked paprika
  • 1 tablespoon dehydrated onion
  • 1 teaspoon kosher salt
  • 1/2 teaspoon black pepper
  • 2 dashes nutmeg
  • 1/4 cup nutritional yeast
  • 2 tablespoon olive oil
Cooking Directions
  1. Boil your pasta according to directions. If you don't have butternut squash or cauliflower puree on hand, it's easy to make. With the squash, peel and dice the squash into cubes. Lightly toss with oil and salt. Bake at 400 degrees for 45 minutes. Transfer to a blender or food processor to puree. Add a little water if the mixture gets too think. For cauliflower, take fresh cauliflower and steam for 5-6 minutes. Transfer to blender or food processor and puree.
  2. When pasta is done, drain and return the same pot to the stove over medium heat. Add all remaining ingredients and stir until well blended. Continue to heat for an additional 1-2 minutes. Add pasta to this mixture and stir well.
  3. Test taste. Sometimes you will need a little more salt to your liking.


Follow along:
 photo facebooksoft_zps2ca46363.png photo instagramsoft_zps234eaf53.png photo twittersoft_zps7e0a4b92.png photo emailsoft_zps2931cb4a.png photo pininterestsoft_zps05cdae05.png photo googleplus_zps1619805c.png photo tumblrsoft_zpsd813c422.png photo rsssoft_zpsaf899a58.png
Tuesday, February 24, 2015

Creamy Chipotle Dip + Alexia Fries = Heaven!

By Meg Hodson

This shop has been compensated by Collective Bias, Inc. and its advertiser. All opinions are mine alone. #GameTimeGrub #CollectiveBias

Well, football season might be over, but we are knee deep in basketball season. My family loves the sport, both college and pro, and it's always fun to have some quality family time together to watch a big game. I like to make these times a little extra special, too. Sometimes, it's pizza night (yep, including eating dinner on the couch!) Other times, it's fixing some of their game day favorites for tip time. 

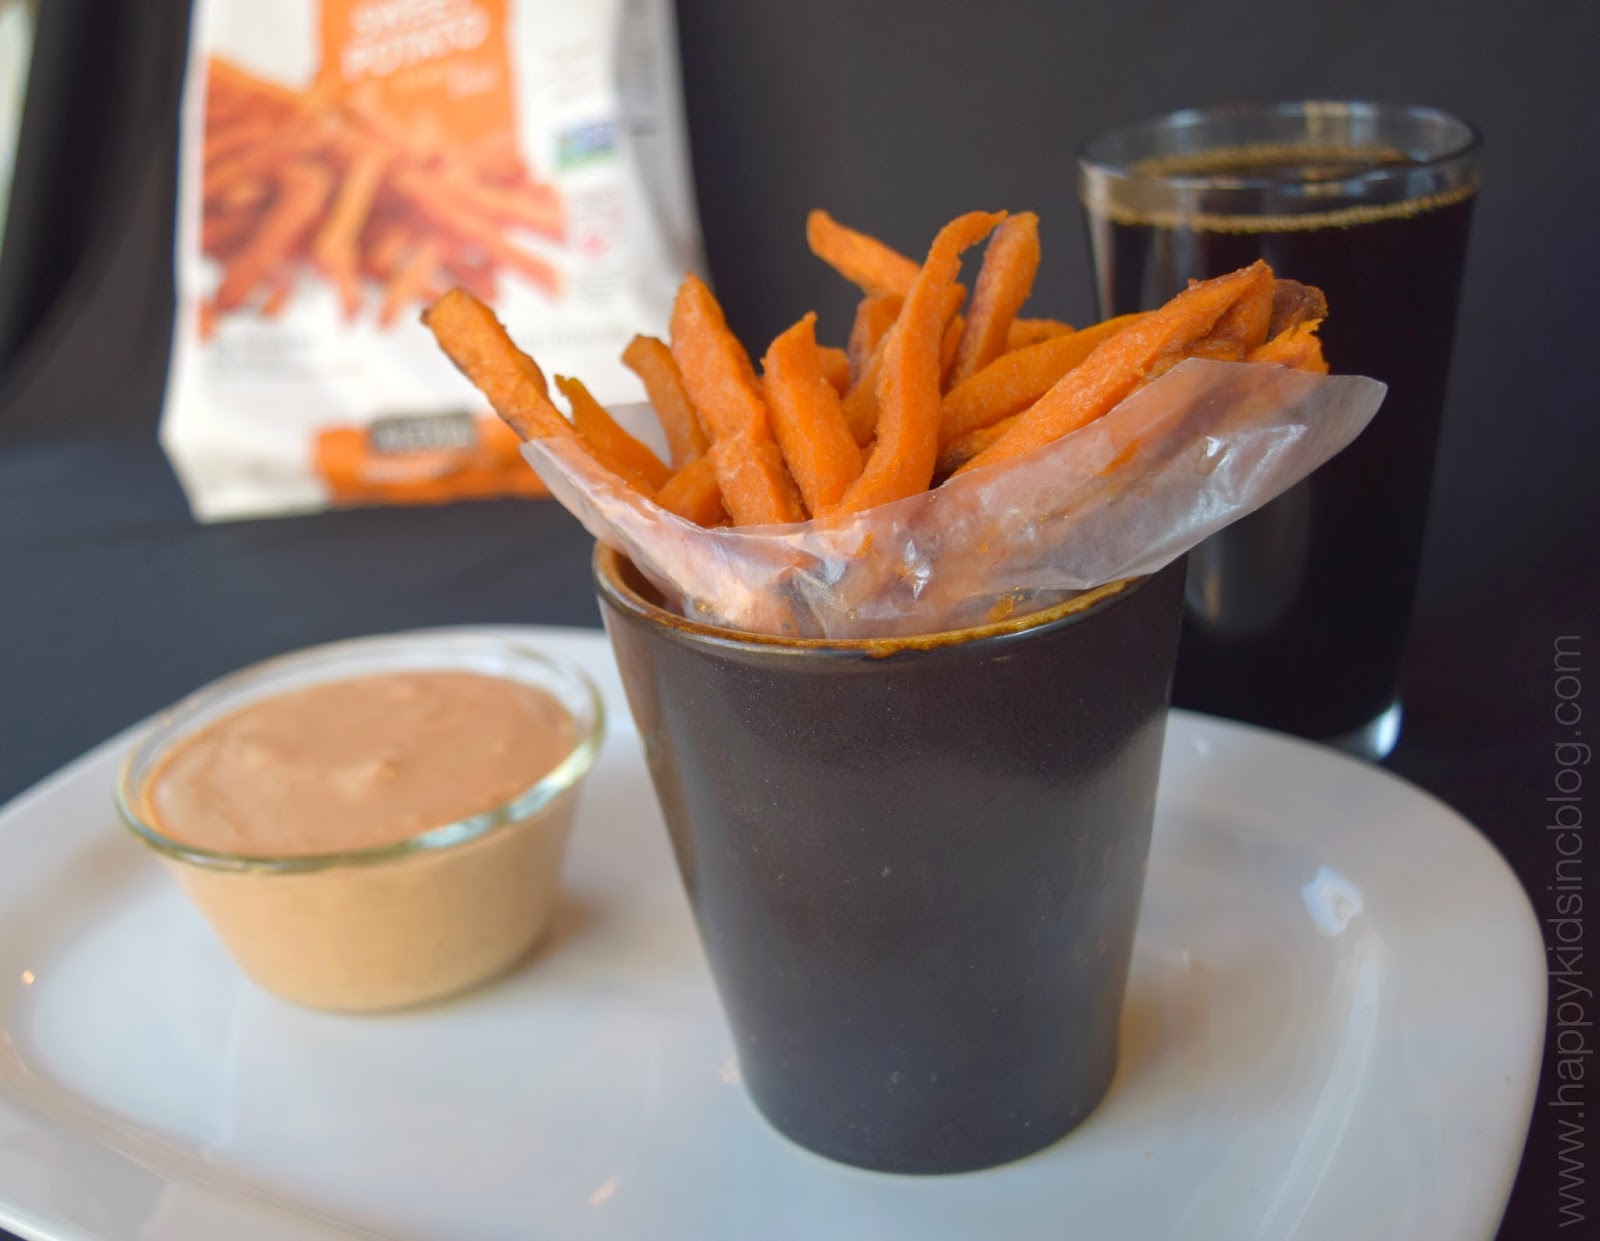
Alexia Foods Sweet Potato Fries Onion Rings Creamy Chipotle Dip recipe

On a recent grocery stop at Wal-Mart, I picked up some of our absolute favorite appetizers from Alexia Foods.  My entire family has been long time fans of Alexia Foods and their yummy french fries and onion rings. I'm a fan for many reasons. Not only are their products delicious, they also aren't filled with preservatives. I feel good about giving a treat like this to my family.

I love using Greek yogurt in many recipes because it tastes like you are having something decadent and rich, yet it's surprisingly low in calories and good for you. I thought a dip with a kick of chipotle would be the perfect compliment to Alexia sweet potato fries (my fave!) or with the Alexia onion rings. The spice in the dip is a perfect accessory for the savory sweetness of the fries. For onion rings, it's a step up from ketchup that makes this an ideal dip for them. Alexia Foods sides are super easy and convenient to prepare....just toss in the oven and bake. This gives you time to prepare this yummy dip while the fries or onion rings cook.


Alexia Foods Sweet Potato Fries Onion Rings Creamy Chipotle Dip recipe

Alexia Foods Sweet Potato Fries Onion Rings Creamy Chipotle Dip recipe

Creamy Chipotle Dip

Prep time: 5 minutes
Cook time: 20 minutes
Total time: 25 minutes
Yield: Serves 4-6

Ingredients
  • 1 cup plain Greek yogurt
  • 2 canned chipotle peppers + juice
  • 1/2 teaspoon smoked paprika
  • 1/2 teaspoon granulated garlic
  • 1/2 teaspoon dried parsley
  • 2 tablespoon olive oil
  • 2 tablespoon pickle juice
  • 1-2 teaspoon kosher salt
  • 2 tablespoon ketchup or tomato paste
Cooking Directions
  1. Prepare your choice of Alexia Foods sweet potato fries or Alexia Foods onion rings according to directions.
  2. While that is cooking, in a blender or food processor, combine all ingredients (start with just 1 teaspoon of the salt and add more later if necessary). Blend well. If mixture seems to thick, add a little more pickle juice. Test taste and if you feel it needs the additional salt, add and re-blend. 
  3. Transfer to bowl and serve with the Alexia Foods side that you prepared. Chill any leftover dip immediately. This also makes a great spread for sandwiches, too!
Alexia Foods Sweet Potato Fries Onion Rings Creamy Chipotle Dip recipe

Alexia Foods Sweet Potato Fries Onion Rings Creamy Chipotle Dip recipe

Alexia Foods Sweet Potato Fries Onion Rings Creamy Chipotle Dip recipe

Alexia Foods products are easy to find in the freezer aisle at your nearby Walmart; look for the flag marked "potatoes".

Alexia Foods Sweet Potato Fries Onion Rings Creamy Chipotle Dip recipe walmart

Alexia Foods Sweet Potato Fries Onion Rings Creamy Chipotle Dip recipe walmart


Sunday, February 15, 2015

Simple Herb Roasted Chicken + Bonus Meals!

By Meg Hodson

This is a sponsored post on behalf of Moms Meet. I received complimentary product for my post. All opinions remain 100% my own. #momsmeet #ad 

I am an avid cook for my family. Except for Friday night pizza and the occasional splurge here and there, it is homemade meals throughout the week. I am best friends' with my dry erase calendar, which I fill up at the beginning of each month with meal assignments for each day. 

One of my favorite meals to prepare is a roasted chicken. My children love chicken and this is the perfect "starter" to numerous meals (more on that below).


I tried out a new line of fresh chicken that I picked up at my near-by Wal-Mart called Harvestland. I chose one of their whole chickens around 5 pounds. It was refreshing to find out that all chickens are raised on family farms with very strict USDA Process Verified programs, which ensures that the chickens are fed all-vegetarian diets with no animal by-products, raised cage-free, and are never given any antibiotics, ever. They also offer organic chicken as well. 


Simple Herb Roasted Chicken
Prep Time: 10 minutes
Cook Time: 1 hour 15 minutes - 1 hour 45 minutes
Total Time:  1 hour 25 minutes - 1 hours 55 minutes


Ingredients
  • 1 whole chicken
  • 3/4 cube butter
  • 1 tablespoon dried basil
  • 1 teaspoon smoked paprika
  • 1 teaspoon granulated garlic
  • 1 tablespoon kosher salt
  • 1 teaspoon black pepper
  • 1 teaspoon ground parsley
Cooking Directions
  1. Preheat oven to 350 degrees. Rinse the chicken well and drain cavity if necessary. Gently loosen the skin across the breasts of the bird. Place in large baking dish. Take 1/2 tablespoon of the kosher salt and sprinkle the cavity and outside of the bird. 
  2. Combine the butter, the rest of the salt, and all the spices and melt together. Gently spoon some of the butter mixture under the skin of the breasts of the bird. Rub half of the remaining mixture across the top of the breast skin, the legs, and wings. Truss (tie) the legs together with twine. If you like, you can dice some potatoes and add to the bottom of the baking dish.
  3. Cook approximately 15-20 minutes per pound until it reaches 165 degrees (check with a eat thermometer). About half way through cooking, drizzle the remaining butter mixture across the top of the bird.
  4. Carve and serve!
I try to get as many meals as I can out of one chicken. Once you carve the chicken, put all the bones and extra fatty parts into a large pot and fill with water until the bones are covered. Add a teaspoon of salt if desired and simmer on low for 2-3 hours. Freeze and use for soups. making rice, etc. It's rich in vitamins, especially calcium.

Sometimes I make soup the very next day. Chicken broth is a great base for most soups. We love cheddar broccoli soup in our house. 

Any leftover chicken meat gets used in school lunches for sandwiches, tossed in caesar salad, and also creates another meal. I shred the chicken and use in enchiladas or burritos. Or, I make a chicken alfredo. 

Keep up with Harvestland on their Facebook and Twitter pages. 


Follow along:
 photo facebooksoft_zps2ca46363.png photo instagramsoft_zps234eaf53.png photo twittersoft_zps7e0a4b92.png photo emailsoft_zps2931cb4a.png photo pininterestsoft_zps05cdae05.png photo googleplus_zps1619805c.png photo tumblrsoft_zpsd813c422.png photo rsssoft_zpsaf899a58.png
09 10 11 12
Blogging tips